Introduction
If you’re planning to install a new air conditioning unit or need professional help to keep your current system running smoothly, understanding what to expect during AC service and installation can make the whole process easier. Getting professional AC service & installation helps keep your home cool, saves energy, and reduces the need for costly repairs. In this guide, we’ll explain the steps involved in AC service and installation, so you know exactly what’s going on when the experts arrive.
1. The Initial Assessment
When you schedule professional AC service or installation, the process begins with an initial assessment. This step is crucial, as it helps the technician understand your cooling needs and the current condition of your system. For a new installation, they’ll take into account the size of your home, the number of rooms, and the layout to determine the right unit size. If it’s a service appointment, they’ll inspect your existing AC to check for issues like leaks, worn-out parts, or low refrigerant levels.
The assessment not only ensures that you get the right AC for your home but also that any necessary repairs or adjustments are identified early on.
2. Explaining Options and Costs
After the assessment, your technician will discuss your options. If you’re installing a new unit, they’ll explain the different types of air conditioning systems available, such as central AC, ductless mini-splits, or heat pumps. Each type has its own benefits, so they’ll help you choose one based on your budget, energy efficiency preferences, and the specific cooling requirements of your home.
For service, they’ll outline what needs to be done, whether it’s replacing filters, cleaning coils, or fixing worn-out parts. They’ll also provide you with a cost estimate, so there won’t be any surprises when it comes to payment.
3. Preparing for Installation
For a new AC installation, the technician will prepare the area. This could involve setting up a pad for the outdoor unit, ensuring the walls are ready for duct or pipe installation, and protecting any surrounding areas from debris. For central AC systems, they’ll also assess the ductwork and determine if any adjustments are necessary. Well-prepared spaces ensure that the installation process goes smoothly and minimizes the risk of issues down the line.
If you’re getting a service, they’ll set up their tools and equipment around the existing unit and may cover any delicate areas to prevent dust from spreading.
4. The Installation Process
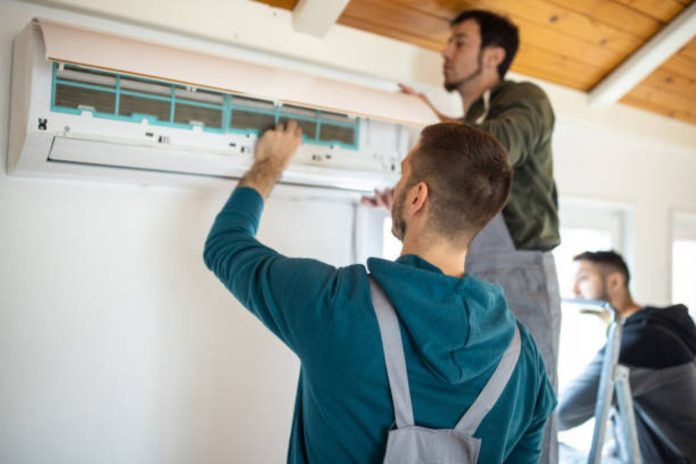
Once everything is ready, the actual installation begins. For a new system, they’ll mount the indoor and outdoor units, connect them with refrigerant lines, and ensure that all wiring is secure. The technician will also connect the unit to your thermostat, which allows you to control the temperature and set cooling schedules. The entire process generally takes a few hours, depending on the complexity of the system and the layout of your home.
If it’s a service appointment, this is the stage where the technician will begin cleaning, repairing, or replacing parts. Common tasks include cleaning the condenser coils, changing air filters, and checking refrigerant levels. These maintenance steps keep your AC running smoothly and prevent unexpected breakdowns.
5. Testing the System
After installation or servicing, testing is a crucial step. The technician will turn on the AC to ensure it’s working properly and efficiently. During this phase, they’ll check the airflow, monitor the temperature, and listen for any unusual sounds that could indicate a problem. They’ll also check that the thermostat is communicating correctly with the AC unit, ensuring accurate temperature control.
For service, testing confirms that any issues have been resolved and that the unit is functioning optimally. This part of the process gives you peace of mind knowing your AC is ready for the warmer months.
6. Explaining Maintenance Tips
Once everything is up and running, the technician will provide you with some helpful maintenance tips. This might include reminders to clean or replace your air filters every few months, keep the area around the outdoor unit free from debris, and schedule regular professional maintenance at least once a year. These tips are simple to follow and can extend the life of your AC, ensuring it runs efficiently and reliably.
7. Wrapping Up and Providing a Warranty
Professional AC service & installation often includes a warranty. The technician will go over the warranty details, letting you know what’s covered and for how long. This can be particularly helpful in the rare event of a malfunction, as many warranties cover parts and labor within a certain period.
If it was a service call, they’ll remind you of any included warranties on replacement parts, so you’re aware of future service options. Warranties give you added security and help you feel confident in your investment.
8. Scheduling Future Service Appointments
Regular maintenance keeps your AC working efficiently and can catch minor issues before they become major problems. Many companies offer service plans where they schedule annual or bi-annual check-ups to keep your system in top shape. Your technician can help you set up a maintenance schedule that fits your needs, ensuring that your AC system stays reliable and effective.
The Importance of Professional Service
Getting professional AC service & installation saves you time and ensures that your system is installed or maintained correctly. Expert technicians have the skills to spot potential issues, ensure proper installation, and keep your AC unit running efficiently, especially during hot months. Reliable service protects your investment, increases comfort, and reduces energy bills.
When it comes to keeping your home comfortable and cool, trust professional AC service & installation to get the job done right. Schedule your appointment today and enjoy the benefits of a well-maintained AC system all year long!


