WordPress is a popular content management system (CMS), offering numerous features for its users to create and improve their sites.
Among the different elements available, WordPress menus are essential when it comes to improving user experience and navigation.
In this WordPress tutorial, you will learn how to create and customize WordPress menus using three different methods. Also, we will show how to enhance your website by adding a custom menu in WordPress.
Why You Need WordPress Menus
A menu is a navigational tool on a website that helps visitors access your web pages faster and easier. Well-structured and clear navigation brings many benefits, such as:
- Better user experience. Menus help users quickly locate the pages and information they’re looking for.
- Better chances of ranking in SERPs. Search engine bots or web crawlers will find and index your content more efficiently if you have well-structured menus. It helps boost your website’s chances to rank in search engine page results (SERPs).
- Highlight important pages. Creating menus is a way to make your website tidier and guide visitors towards your most important pages, social media profiles, and so on.
Additionally, we can divide menus into two main categories: the primary menu and the secondary menu.
The primary menu serves as the main navigation interface. It is usually located at the top of the homepage and contains the pages the visitors will most likely visit. Home, product, and blog sections can be included in this category.
The secondary menu is a sub-category that allows visitors to access non-essential information. For example, place links to your social media channels and FAQ pages.
3 Ways to Create a WordPress Menu
When it comes to menu customization, WordPress provides different options to choose from. Depending on your knowledge and needs, you can use WordPress’s built-in functionality, a plugin, or code the menu from scratch.
Before adding and editing your website menu, we recommend that you create a sitemap or plan how your WordPress menu structure should look like.
1. Use the Built-In Functionality
The first option to create a menu is using the WordPress menu editor, which is relatively straightforward. To begin, follow these steps:
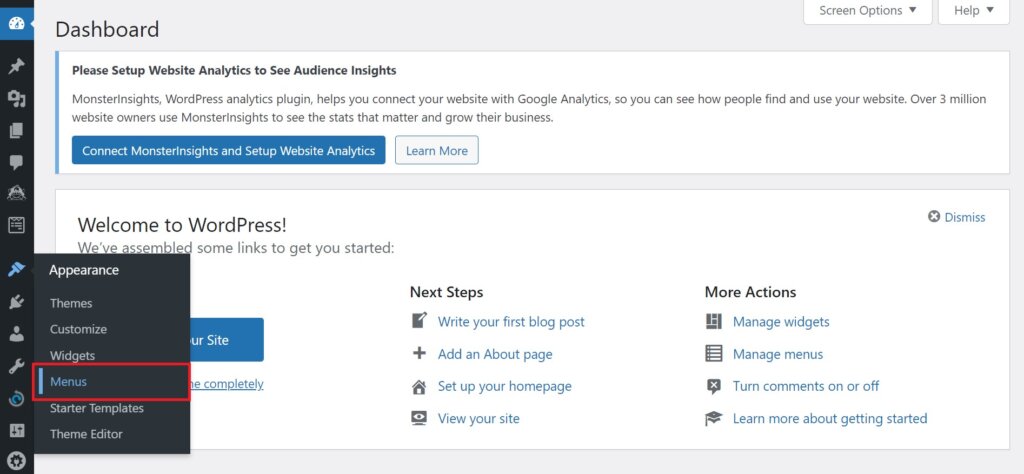
- Go to your WordPress Admin. Then, navigate to Appearance -> Menus.
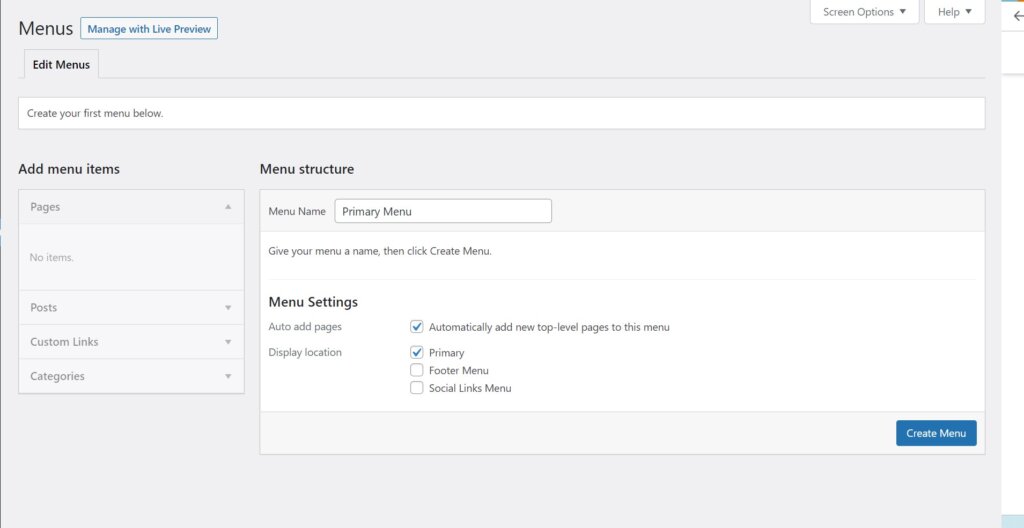
- Create a new menu, naming it Primary Menu, for example. Then, on Menu Settings, check the options Automatically add new top-level pages to this menu and Primary.
- Once you click on Create Menu, the page will refresh, and you are ready to customize the new menu. To add menu items, you need to create some pages to display in the Pages column. Alternatively, select a WordPress template with pre-built pages.
- When you finish customizing the menu, don’t forget to click the Save Menu button.
Note that if you have checked the Automatically add new top-level pages to this menu, the pages you created will automatically be added to your Primary Menu.
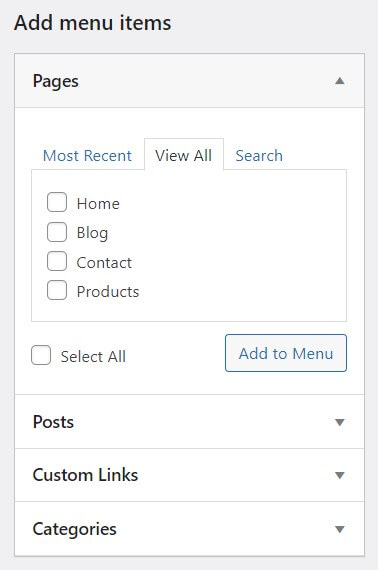
That being said, you’ll need to add them manually if they are not available in the Menu structure tab. Click the View All tab and check each page or Select All on the Pages column. Then, click Add to Menu to confirm the changes.
2. Use a WordPress Plugin
Building your menu using a WordPress plugin is also worth considering, as it provides more features and design options. For example, you can add rows and icons to your menu.
To show you how to create and customize a menu, we will use WP Mega Menu. After you install and activate the plugin, follow the steps below:
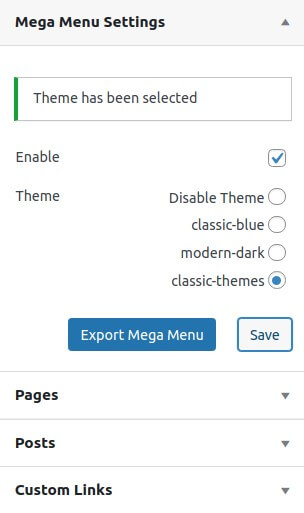
- Navigate to Appearance -> Menus. On the Mega Menu Settings page, check Enable and select a theme. Click Save.
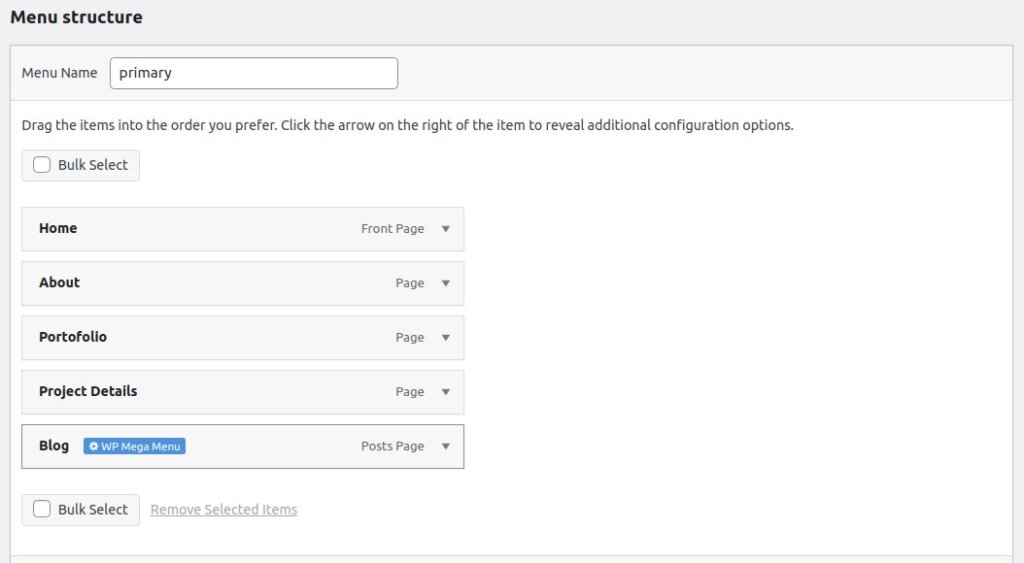
- Now, you can customize the menu using the plugin. To do that, navigate to Menu structure and select a page to edit – for example, the Blog page.
- Hover your cursor over the page and click the toolbar that says WP Mega Menu.
- On the WP Mega Menu editor, click on the toggle to enable Mega Menu – a sidebar containing widgets will show up.
- Click on Add Row and choose a template. You can also add widgets by dragging them to the Column section.
- To add an icon to the page you are editing, navigate to the Icon bar. Then, simply select an icon from the list.
- When you are finished, close the editor, and you will be taken back to the Menus page.
3. Code Your Own Custom Menu
Another way to create WordPress menus is by coding them from scratch. This method suits web developers and tech-savvy users who are creating their own theme or custom website.
To build and customize navigation menus using a code editor, there are four steps you need to follow:
- Register the menus.
- Display the menus on the site’s homepage.
- Display additional content, like sub-categories.
- Define a callback.
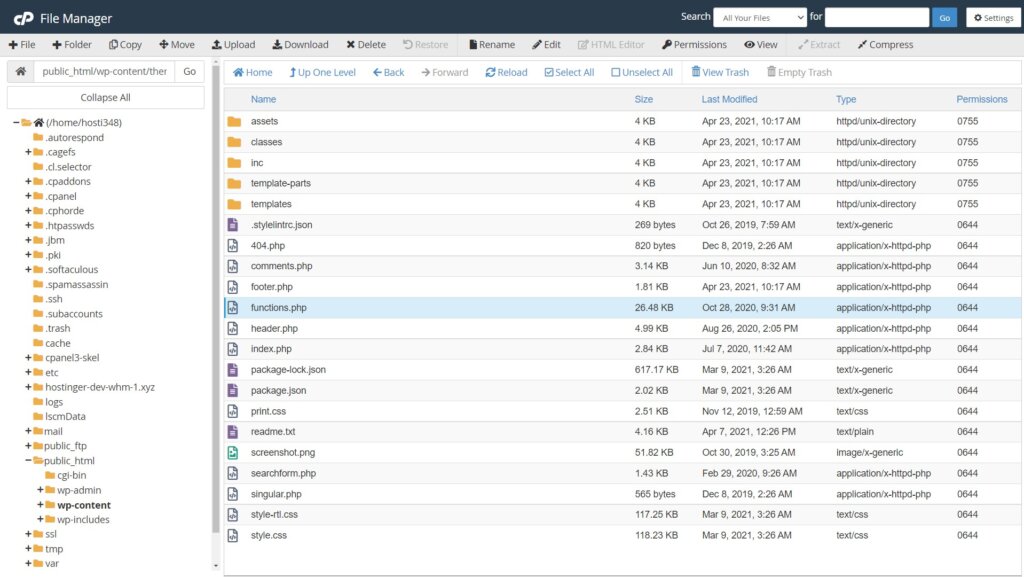
Once you are ready, open the WordPress function.php file via a file manager or File Transfer Protocol (FTP) and follow the instructions:
- Inside the function.php file, use the register_nav_menus() function to tell WordPress which menus to add.
| function register_my_menus() {
register_nav_menus( array( ‘header-menu’ => __( ‘Header Menu’ ), ‘categories-menu’ => __( ‘Categories Menu’ ) ) ); } add_action( ‘init’, ‘register_my_menus’ ); |
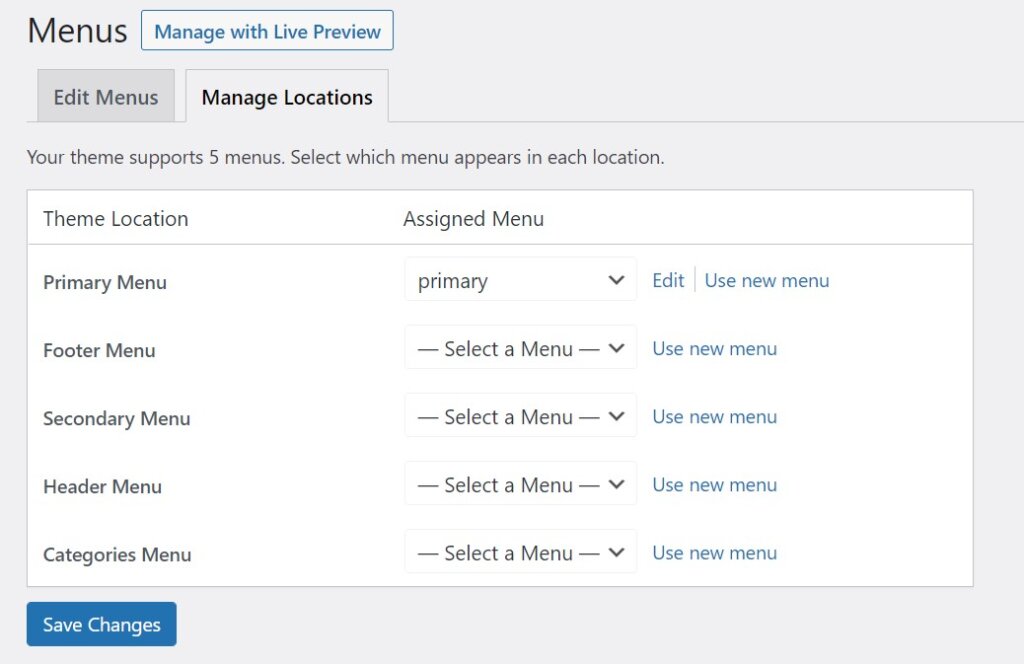
In this example, WordPress will generate two menus on the Manage Locations tab: Header Menu and Categories Menu.
- Next, use the wp_nav_menu() function to tell the theme where to display the menu. Open the header.php file and paste the following code:
| wp_nav_menu( array( ‘theme_location’ => ‘header-menu’ ) ); |
- Repeat the step for any other menus you have created. Alternatively, add a container_class function to style the menus with CSS.
| wp_nav_menu(
array( ‘theme_location’ => ‘categories-menu’ ) ); ‘container_class’ => ” ) ); |
You can add almost any additional content using the wp_nav_menu () function. Here is an example of the foother.php file from the Twenty Seventeen theme, which displays span elements:
| wp_nav_menu(
array( ‘theme_location’ => ‘social’, ‘menu_class’ => ‘social-links-menu’, ‘depth’ => 1, ‘link_before’ => ‘<span class=”screen-reader-text”>’, ‘link_after’ => ‘</span>’ . twentyseventeen_get_svg( array( ‘icon’ => ‘chain’ ) ), ) ); |
Lastly, set parameters to prevent WordPress from generating a page menu when no custom menu is selected. Use the theme_location and fallback_cb parameters as follows:
| wp_nav_menu(
array( ‘menu’ => ‘primary’, // do not fall back to first non-empty menu ‘theme_location’ => ‘__no_such_location’, // do not fall back to wp_page_menu() ‘fallback_cb’ => false ) ); |
Creating Secondary WordPress Menus
Now that you have created your website’s primary menu, adding secondary menus to showcase your social media profiles or other important information is worth considering.
To do that, follow these steps:
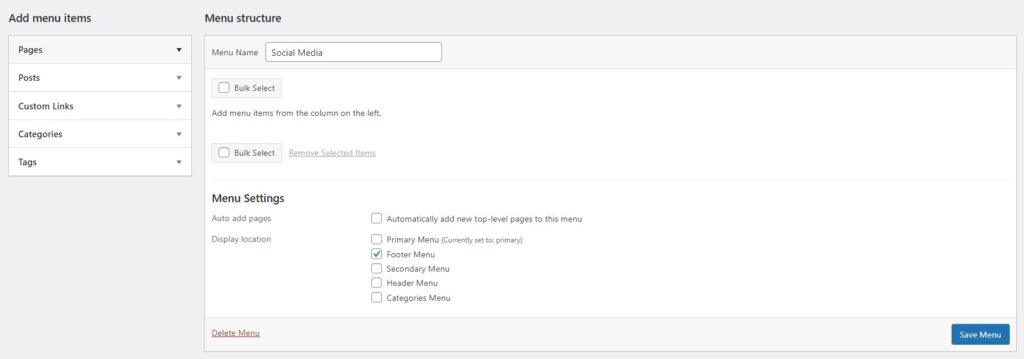
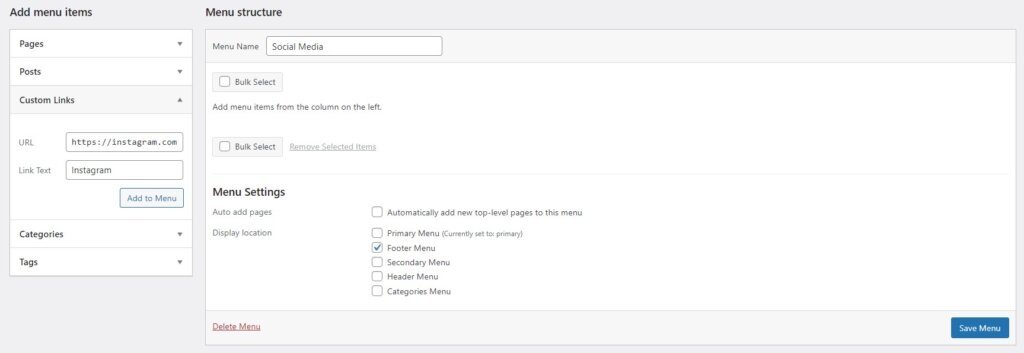
- Go to Appearance -> Menus. Create a new menu and name it Social Media, for example. Click the Create Menu button to generate it.
- Remember to check the Display location where the menu should appear. In this example, we’ll choose the footer.
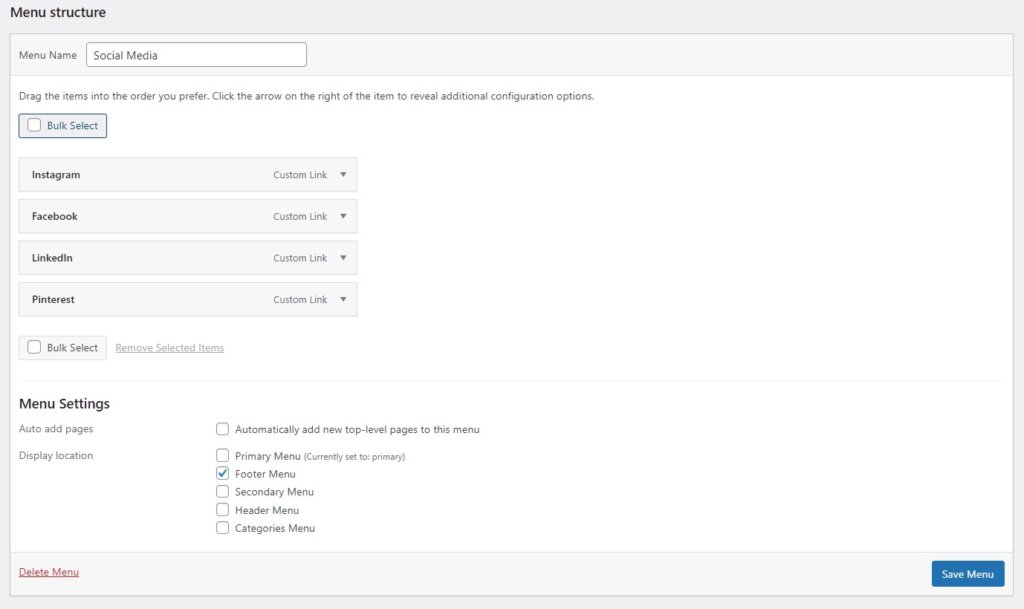
- After that, navigate to Add menu items -> Custom Links. Here, you can add your social media accounts, such as https://instagram.com/myblog/, and the link text. Click Add Menu to add the custom link and save.
Repeat the process to add other social media links to your custom menu in WordPress.
Conclusion
Creating and editing your WordPress custom menus is a great way to improve website navigation. A good structure helps search engines index your content faster, enhances user experience, and declutters the site’s appearance.
In this article, we discussed three different methods of creating and customizing menus in WordPress:
- Using the built-in WordPress menu editor.
- Using a plugin like WP Mega Menu.
- Coding the menus from scratch.
Additionally, you learned how to create secondary WordPress menus to include your social media profiles and any additional links.
Hopefully, this article will help you create an attractive and functional WordPress website. Good luck!


