


Think about your car’s rearview mirror. For over a century, it has been a simple piece of reflective glass. It’s a technology that is plagued by limitations: massive blind spots created by your car’s pillars, the blinding glare of headlights behind you at night, and a view that can be completely blocked by passengers, luggage, or even just the headrests in the back seat.
In a world of smart cars and advanced safety features, the traditional mirror feels like an analog relic. But what if you could replace it with a high-definition, unobstructed, panoramic view of the world behind you, while also adding the security of a high-end dash camera?
That is the promise of the mirror dash cam. This clever device is one of the most practical and powerful upgrades you can make to your vehicle. This is your complete how-to guide for understanding, choosing, and installing the system that will fundamentally change the way you see the road.
Your Step-by-Step Guide to a High-Tech Rearview
The idea of adding new technology to your car can seem intimidating, but the process of upgrading to a mirror dash cam is surprisingly straightforward. Let’s walk through it, one step at a time.
Step 1: How to Understand the Mirror Dash Cam Advantage
Before you start shopping, it’s important to understand what this device is and why it’s so much more than just a camera.
More Than a Camera, It’s a New Way of Seeing
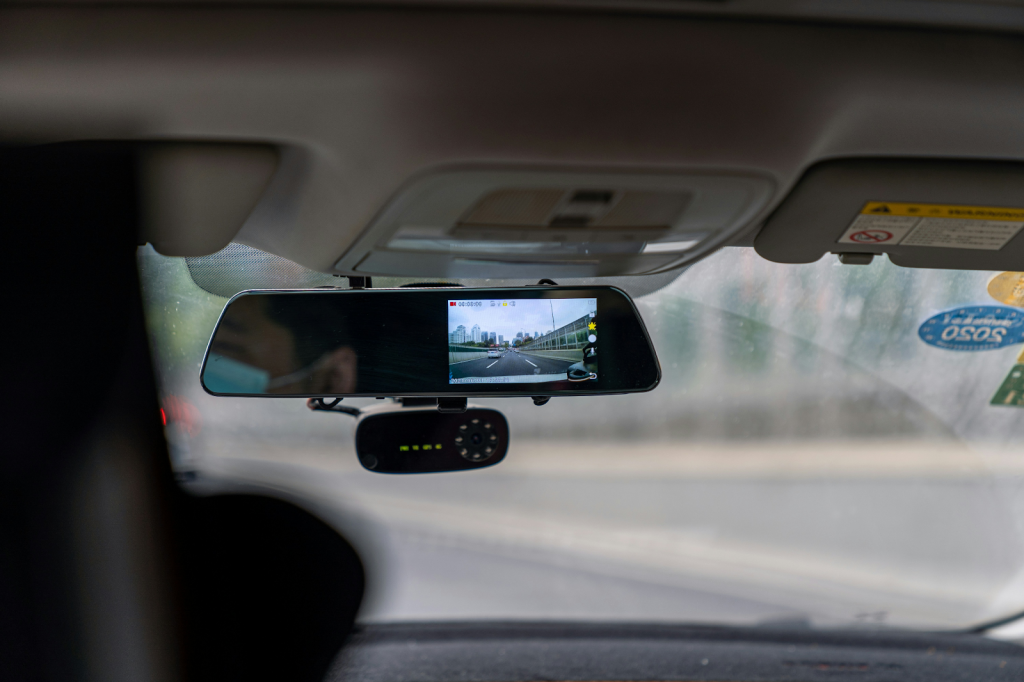
A mirror dash cam is an integrated unit that securely straps over your car’s existing rearview mirror. In its default state, it functions as a high-quality mirror. But with the touch of a button, the entire surface comes to life as a vibrant LCD screen, displaying a live video feed from a camera mounted on the rear of your car.
This video feed is not a fisheye parking camera view. It is a crisp, clear, wide-angle perspective that shows you everything behind you, free from the obstructions inside your car. You can swipe up or down on the touchscreen to digitally aim the camera, giving you a perfect, customized view of the road.
The Key Benefits That Will Change Your Drive
This technology provides two distinct sets of benefits: enhanced driving vision and the full security of a traditional dash cam. The visual upgrades alone are a game-changer, virtually eliminating blind spots and making lane changes safer. It provides a crystal-clear view at night and makes parking a breeze, with on-screen guidelines that appear when you shift into reverse. Of course, it’s also a dual-channel dash cam, with a forward-facing camera recording the road ahead and a rear camera recording what’s behind you. For a deeper dive into all the features and advantages, a complete overview of the rear view mirror dash cam is an excellent resource.
Step 2: How to Choose the Right Model for Your Car
Once you understand the benefits, you’ll find a huge market of options. Focus on these key features to narrow down your choice.
Screen Size and Resolution
The bigger and brighter the screen, the better the experience. Look for a large touchscreen (typically 9 to 12 inches) that is responsive and easy to see in daylight. Most importantly, check the camera resolution. You want a minimum of 1080p Full HD, but many top models now offer 2K or even 4K resolution for the front camera. This level of detail is crucial for being able to read license plates and street signs in your recordings.
Essential Dash Cam Features
A great mirror dash cam should have all the standard features of a high-quality standalone dash cam. These are non-negotiable:
- Loop Recording: This automatically overwrites the oldest footage when the memory card is full, so the camera is always recording.
- G-Sensor: This detects a sudden impact (like an accident) and automatically locks the video file, so it cannot be overwritten.
- Parking Mode: This feature monitors your car even when it’s parked. If it detects a bump or motion, it will wake up and record a short clip, potentially capturing a hit-and-run or vandalism.
Bonus Features to Look For
Premium models often include advanced features like built-in GPS, which logs your vehicle’s speed and location data with your video footage. Voice commands are another fantastic, high-end feature, allowing you to do things like lock a video file, take a photo, or turn the screen on and off without ever taking your hands off the wheel.
Step 3: How to Install Your New System Like a Pro
This is the part that makes most people nervous, but it shouldn’t. You do not need to be a car electronics expert to perform a clean and functional installation.
The “Is This Hard to Do Myself?” Question
For most users, a basic installation is a very manageable DIY project that can be completed in under an hour with no special tools. The basic setup simply involves plugging the device into your car’s 12V power outlet (the cigarette lighter). A more advanced installation involves “hardwiring” it to your car’s fuse box, which provides a cleaner look and enables more advanced parking mode features, but this is an optional step you can have professionally done.
Your Blueprint for a Clean Installation
A clean, professional-looking installation is all about hiding the wires. While the specifics can vary slightly between vehicle models, the general process is straightforward and just requires a bit of patience. For a complete, step-by-step visual guide that shows you exactly how to mount the cameras and tuck the wires into your car’s headliner and interior trim panels, the definitive blueprint is a dedicated mirror dash cam installation guide.
A mirror dash cam is one of the single best technology upgrades you can make for an existing vehicle. It provides the invaluable security of a dual-channel dash cam while simultaneously solving the age-old problems of blind spots, glare, and obstructed views. By following these steps to understand, choose, and install the right system, you’re not just adding a new gadget to your car, you are fundamentally upgrading your situational awareness and your confidence every time you get behind the wheel.


")

