If your car’s brakes are making grinding noises when you press them, or the steering wheel shakes when braking, the brake rotors may be worn and need replacing. Replacing brake rotors can improve braking performance and extend the life of your brake pads. While it’s best to have rotors replaced by a professional mechanic, it is possible to DIY if you have some automotive experience.
In this step-by-step guide, we’ll walk through the entire brake rotor replacement process. We’ll cover:
- What are brake rotors and signs they need replacing
- Brake rotor replacement parts and tools needed
- Step-by-step instructions for safely removing and installing new rotors
- Bedding in and post-installation inspection steps
Read on to learn everything you need to know to replace your vehicle’s worn out brake rotors. Or visit allrotors for quality, affordable brake rotors shipped to your door.
What Are Brake Rotors?
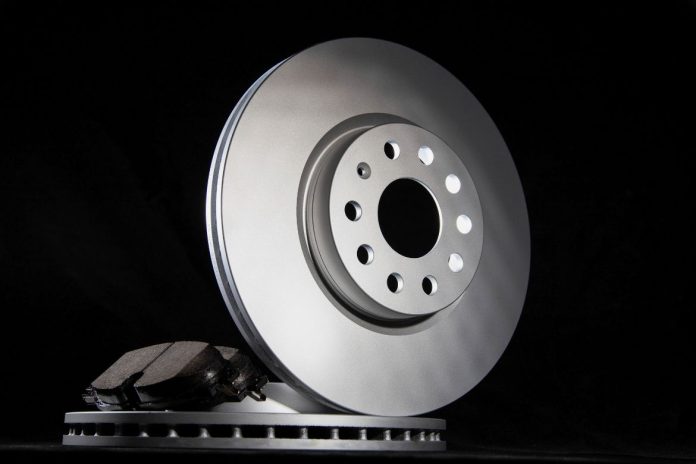
The brake rotors (also called brake discs) are metal discs that attach to your vehicle’s wheel hub. When you press the brake pedal, brake pads clamp against the rotor on both sides to slow the wheels. This friction is what brings your vehicle to a stop.
Over thousands of miles of driving, the rotors wear thin and become less effective at dissipating heat and braking smoothly. Grooves and uneven surfaces also develop on the rubbing surface. That’s why rotors need to be replaced every 30,000-70,000 miles depending on driving style and conditions.
Signs Your Brake Rotors Need Replacing
Here are some common signs your brake rotors are overly worn and due for replacement:
- Brake squeal or grinding noise when braking
- Vibration or shaking through the brake pedal or steering wheel when stopping
- Warping or thickness variation causing pulsating brake pedal
- Visible worn spots or grooves on the rotor face
- Excessive brake dust on the wheel rim from the brake pads wearing faster
If you notice any of those symptoms frequently, it likely means the brake rotors can no longer dissipate heat effectively and need to be swapped out.
Parts and Tools Needed
Replacing brake rotors isn’t too complicated for a DIY mechanic. Here’s a checklist of everything you’ll need:
Parts:
- New brake rotors (pair for both front or rear)
- Brake caliper bolts/slides if worn
- Brake pad set (consider replacing pads at the same time)
Tools:
- Floor jack & jack stands
- Tire iron/lug wrench
- Wheel chocks
- Bungee cords
- Brake caliper wind-back tool
- Torque wrench
- Socket set & wrenches
- Brake cleaner spray
- Brake grease/lubricant
- Gloves, glasses, buckets, rags
Shopping for new brake rotors? Be sure to search make/model/year on allrotors.com for guaranteed fitment with fast shipping.
Step-By-Step Brake Rotor Replacement
Once you’ve gathered all the required brake job parts and tools, you’re ready to get your hands dirty. Refer to your vehicle repair manual for specific torque specs and procedures. Here is the basic process:
- Park on level ground. Check the tires, apply parking brake, do not start engine.
- Loosen the wheels’ lug nuts using the tire iron.
- Jack up the vehicle and support it securely with jack stands at manufacturer jacking points.
- Remove lug nuts and wheel.
- Remove caliper bolts to detach brake caliper from mount. Use wind-back tool to safely hang caliper out of way, do not strain brake line.
- Inspect caliper slide pins for smooth movement. Use brake cleaner and lubricant to de-gunk stuck pins so caliper can float properly over new rotor. Replace caliper bolts/slides if excessively worn.
- Remove old rotor and clean away debris from hub face for flush contact with new rotor.
- Install new rotor by sliding over wheel studs. Add a thin layer of brake grease on hub/rotor contact point to prevent rust bonding.
- Remount caliper using new or cleaned caliper mounting hardware. Apply thread locker, torque bolts to spec.
- Repeat steps on the other wheel(s).
- Refit wheels and hand tighten lug nuts in crisscross star pattern.
- Lower vehicle, then torque lug nuts to spec in sequence with calibrated torque wrench.
- Pump brake pedal to seat new pads against rotor, topping off brake fluid reservoir as needed.
- Complete job by bedding-in pads and rotors per next section.
Bedding In New Brake Rotors
Freshly replaced brake rotors should go through a “break-in” process to achieve maximum life and performance. The bedding procedure involves making a series of moderate stops to evenly transfer material (friction layer) from the pads onto the new rotor faces.
Find an empty straight road and accelerate to about 40 mph. Firmly apply the brakes to scrub off around 20 mph. Return to 40 mph and repeat the moderate braking 5-6 times, allowing a brief cool-down between each stop. Avoid panic stops during break-in. Then allow brakes to fully cool before normal driving. This completes the bedding cycle so the new components can perform as designed going forward.
Post-Installation Checks
Once brake rotors have gone through the proper break-in cycle, do some final checks before considering the brake job complete:
- Confirm rotor faces show an even blue or gray finish across the entire contact patch. No cleaning or sanding should remain visible.
- Brake pedal feels firm and consistent without vibration, pulsing or abnormal travel.
- Braking is quiet without squeaks or grinding noises from pad/rotor indicators worn in.
- Vehicle easily passes brake performance tests like stopping smoothly from 30 mph.
As you can see comprehensive DIY, replacing brake rotors does require some preparation, patience and mechanical competency. Having proper tools and parts on hand is also essential. But taking an organized approach while referring to the vehicle service manual, most moderately skilled DIYers can handle this essential brake maintenance task.
Just remember if you ever feel unsure about servicing your own vehicle’s safety systems, always consult a certified professional technician. Visit allrotors.com for more auto repair tips and top-rated brake components shipped to you.


